10 Step Guide to Making an Ecobrick
Ecobricks can be made by the young, the old and everyone in between — no machines, special skills or experts required! However, there are important guidelines to follow to ensure the quality and usability of your ecobricks.
Be sure to start ecobricking right— this is a long-term life habit that you, your household and community are beginning. Likewise, your ecobricks will set the example for everyone around you. Sub-standard ecobricks will compromise the quality of furniture modules, constructions and the social spread of ecobricks while, well-done ecobricks can be put to good, safe use and will secure plastic for centuries. We’ve put this 10 step guide together to help you on your journey of making great ecobricks.
1. Save, Segregate, Clean & Dry Plastics
Ecobricks are made with clean and dry plastic. Start by segregating your plastic from all other materials. Some ecobrickers bring a bottle with them everywhere they go. Others save up their ecobrickable plastic in a bin til they have time to get to it.
If there is any food, oil or dirt on your plastic, be sure to wash it off. Dirty plastic inside an ecobrick will lead to microbiological growth and methane forming inside your ecobrick (for a solution for dirty plastic see the Ocean Ecobrick). Since ecobricks are often used to make home furniture you also want to avoid unsightly ecobricks, bloated bottles and in rare cases, caps popping off.
Its likewise important that the plastic is dry! Wet and moist plastic will also encourage mircobial growth. Ecobrikers around the world use different methods for drying their washed plastic– from laundry machines to cloths lines.
Advanced
2. Choose your bottle
Before you start ecobricking, choose one specific bottle and stick with it. When it comes time to building, having perfectly identical ecobrick sizes is important for making solid and steady modules. It also helps having at least the same general size of bottle when it comes to building with earth and ecobricks. Talk with ecobrickers in your community and make the choice together of what bottle to use.
When selecting the bottle that you will use, consider three factors: the bottle’s availability, the volume, and the project you will use the ecobrick for.
1. Availability
The last thing you want to have to do is buy drinks to have a bottle for your ecobricking! Soon many people will be ecobricking in your community and it is ideal to have everyone using the same brand and bottle. Be sure to choose a bottle that everyone can easily come by.
2. Volume
Choose the bottle volume you want to go with. GEA Trainers teach ecobricking with bottles under 600ml. Large 1500ml bottles will take a lot of plastic, but also take a long time to make! Small volume bottles allow first-time ecobrickers to finish their first ecobrick and quickly learn from their mistakes. Large bottles are best for advanced ecobrickers.
3. Your Project
For building modules with Ecobricks, you need bottles that are exactly the same size and shape. For outdoor building projects, exact sameness is not so important, so long as the volume is consistent (i.e. all 600ml bottles). Depending on the size of construction, you will need different size bottles. For example, small bottles make good walls, and large bottles make good benches. See our Construction Guide for more information on the different ways ecobricks are applied.
Advanced
3. Get your stick ready
Ecobrickers like to call their packing stick, their magic wand. It makes the plastic disappear! Having the right stick will make a big difference to your ecobricking. Bamboo and wood make the best sticks. The size of the stick depends on the type of bottle you go with. You want a stick with a diameter roughly one third the width of a standard bottle opening– so about 6mm. You want your stick to be about twice the height of your bottle, with a slightly rounded tip. Avoid sharp cornered sticks as they can rupture your bottle– and yes, this means you have to start your ecobrick all over again!
Once you’ve got a stick with a good size and shape, you’re set! You can then give it to others to copy and replicate. That’s how our GEA Trainers do their workshops– more magic! One stick turns in to many!
Advanced
4. No glass, metal or biodegradables
What you don’t put in your ecobrick is just as important as what you do! The reason we are putting plastic inside a bottle is to secure it– otherwise it would get loose into the environment and degrade into microplastics and toxins. Stuff like cotton cloth, metal, paper, cardboard, glass and organic material will not degrade into toxins so there is no need to secure them. Be especially careful not to pack sharp metal or glass into an ecobrick– they can rupture the sides and pose a danger for handling. There are other solutions for these materials:
- Paper and cardboard can be safely industrially recycled, composted or burnt.
- Biodegradables can be composted or left to biodegrade.
- Metals and glass can be industrially recycled.
Advanced
5. Start by adding a bottom color
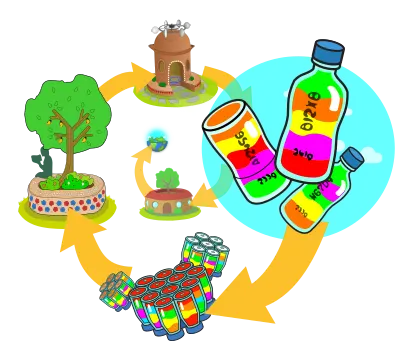
It is important to start your ecobrick by adding a bottom color. This is part of the circular design principle of ecobricking: we’re thinking about the next use of the ecobrick. When your ecobrick is put to use in a module or an earth construction the bottom color will help make patterns and designs.
To create your ecobrick’s bottom color, choose a soft plastic with a solid color, then push it down to the bottom of your ecobrick. You’ll want to fill the bottle loosely about half way with soft plastic of your chosen color. Then, pack it in with your stick. If your bottle has “legs” or dimples at the bottom be sure to pack these solid and full. Once all your soft plastic is compressed you want it to fill the first 1-2cms of the bottle.
Often schools or companies will ask their ecobrickers to make ecobricks with their community colors. By giving your ecobrick bottom a color, you open up colorful design possibilities for making modules or earth and ecobrick walls.
6. Pack the bottle tight, mixing plastics as you go
Now it’s time to pack away! Cut or rip up large plastics into smaller pieces. The smaller the pieces, the denser you’ll get! Fill the bottle up half way with loose plastic, then use your stick to push down around the sides of the bottle. Keep pushing down as you move around the circumference of the bottle. Once compressed, add more loose plastics. To maximize the density, it’s good to mix soft, then hard plastic. If it’s your first ecobrick, weigh occasionally to make sure you are on track for your target minimum weight.
Did you push too hard? In rare cases, when using a sharp stick, a thin bottle or too much lateral force, an ecobrick will rupture. If so, start again. Ruptured bottles will not last and can leak plastics. Cut the bottle open, remove the plastic and start again. Cut or damaged PET plastic is readily recycled.
Advanced
7. Weigh your Ecobrick to ensure quality
The weight vs volume of your ecobrick is a good indicator of the quality of your ecobrick. Ecobricks that are solid and strong are densely packed. The full volume is used for plastics and there is no air or spaces inside. The GEA has determined that an ecobrick’s density must be higher than 0.33 g/ml. This means that a 600ml bottle must be above 200 grams and a 1500ml bottle must be above a weight of 500 grams. Experienced ecobrickers tend to regard 0.37 g/ml and above as the range of a good ecobricks.
We’ve discovered that obligating minimum density in your communities ecobricking is essential to ensure quality ecobricks. Quality ecobricks ensure solid and safe constructions and make the maximize the bottle’s volume for securing plastic out of the environment.
Ecobricks that are below 0.33 g/ml are too squishy to be used for modules and are not ideal for earth building. Soft ecobricks can compromise structural constructions and will dent easily, which reduces their lifespan. Low density ecobricks are also fire hazards because of the air pockets remaining inside them,
That said, a good solid ecobrick that meets all GEA guidelines is something you can be proud and which will inspire others! An ecobrick’s heft and quality set an inspiring example for others and energize the social spread of ecobricks. When others see and hold your ecobrick, they will understand immediately that something important has happened: “waste” has been transformed into something fundamentally useful.
Advanced: Max Density
8. Cap and Log
So your ecobrick is packed as solid as possible– now its time to cap it! First, be sure your ecobrick is not packed to overflowing. There should be about 1-2cm between the cap and the plastic inside. The cap (HDPE) is made of a different type of plastic than the bottle (PET) and is the weakest part of the ecobrick. If plastic is even slightly pressing up against the lid, the pressure will inevitably crack it over the years. Also, be sure to avoid flip-tops or sports caps when sealing your ecobrick as they are fragile and will break easily over time.
Once capped, it is time to record your ecobrick! Recording your ecobrick’s key data an important part of ecobricking wether your doing it on your own or as part of a community. This is in particular important for community leaders. You can use a log sheet, a spread sheet or the GoBrik app to record data such as…
- The ecobricker’s name
- The final weigh
- Date and year
- The intended Project
- Serial Number (generated by the GoBrik App)
Recording ecobricks is key to calculating your overall impact, monitoring quality and preparing for building projects.
By recording the weight, you can tally up all your ecobricks and calculate the total plastic you have kept out of the environment. By recording name and weight you enable quality accountability. By maintaining a record of how many ecobricks you have completed, you’ll know when your ready to move to the building stage of your project. By recording the date you to let people tomorrow know that we cared today about their world.
We’ve worked hard to craft a universal web app for you to use to log and connect your ecobricks with those in your community. Simply visit www.GoBrik.com with the web browser on your phone, sign in with Facebook or email, create an account, then begin to log your ecobricks. GoBrik will do the rest– compiling stats for you and your community.
We’ve also made a point-chart and sample form in our Vision Ecobrick Guide that can be photocopied for logging ecobricks in schools.
9. Inscribe
As you log and record your ecobrick, be sure to record the key data on the ecobrick itself too. Inscribing the weight, data, serial, etc. onto the ecobrick will indicate that the ecobrick has been logged and registered. Be sure to use a permanent means of recording your ecobrick. Your ecobrick will endure for decades and centuries. The more information we can leave future generations, the richer our gift. After much experimentation, we have found that enamel/oil paint and nail polish work best.
- Avoid using paper labels, tape, or stickers to record the data. These methods will last for several years at best then fall off.
- Avoid using permanent markers. Not only does their writing not last long on PET, they are made of non-recyclableable and non-ecobrickable materials.
- Enamel paint usually comes in a metal can or glass jar. These containers are effectively recyclable.
- Use a paint brush to carefully and clearly inscribe the ecobrick’s data. The paint bonds to the plastic and is almost impossible to remove.
- Use contrasting colors like white and black to make your inscription stand out.
- Nail polish is a form of oil paint and also permanently inscribes the ecobrick. However, often the nail polish brush makes it hard to write legibly. Also the smell of the polish drying is strong.
Some ecobrickers are innovating with other methods– such as etching onto the ecobrick or inserting a written plastic tag into the bottle itself.
Extra: Add a vision
10. Store your ecobrick
Once complete, you will need to store your ecobricks until you have enough for you project. Store ecobricks indoors, out of the sun. If possible protect with a cloth or tarp from accumulating dust and dirt (PET attracts dust and chemicals and is hard to remove). Stack horizontally, with the ends pointed outward. This enables you to organize your ecobricks by colour and brand– which later facilitates project planning and making. It’s good to have the ecobricks raised slightly above the floor — rats have been known to chew away at bottles! Ideally, ecobricks are stored off of the ground (on a floor or raised on wood) and fully protected from the sun and the elements. Ecobricks are best stacked horizontally with their bottom pointed outwards.
And... Build!
Once you have enough Ecobricks you’re ready to build. There are five main techniques for building with bottles and ecobricks. The easiest, fastest, and perhaps the most fun Ecobrick application, is to make Milstein modules for horizontal building and Dieleman Lego modules for vertical building. With modules you can create benches, table, chairs, structures and more. Perhaps the best use for Ecobricks is building community green spaces. Using local earth and ecobricks you and your community can build beautiful spaces that enrich the local environment.
Why Ecobrick?
Ecobricks keep plastic & C02 out of the biosphere. Ecobricks raise ecological consciousness. And more!
Plastic Can Become Poison
Through sun and water exposure, plastic breaks down into environmental toxins and microplastics. Packing it into an ecobrick secures it from poisoning the biosphere.
Find a Trainer
Our trainer network extends through the UK, Philippines, Indonesia, the USA and more. Book an Ecobrick Starter Workshop!
Regenerative
Ecobricking is a what we call a regenerative technology. Rather than "sustaining" the status quo, we're careful that everything we do re-greens rather than greys.